To create a Schedule for the Widget to be Online or Offline
Contents
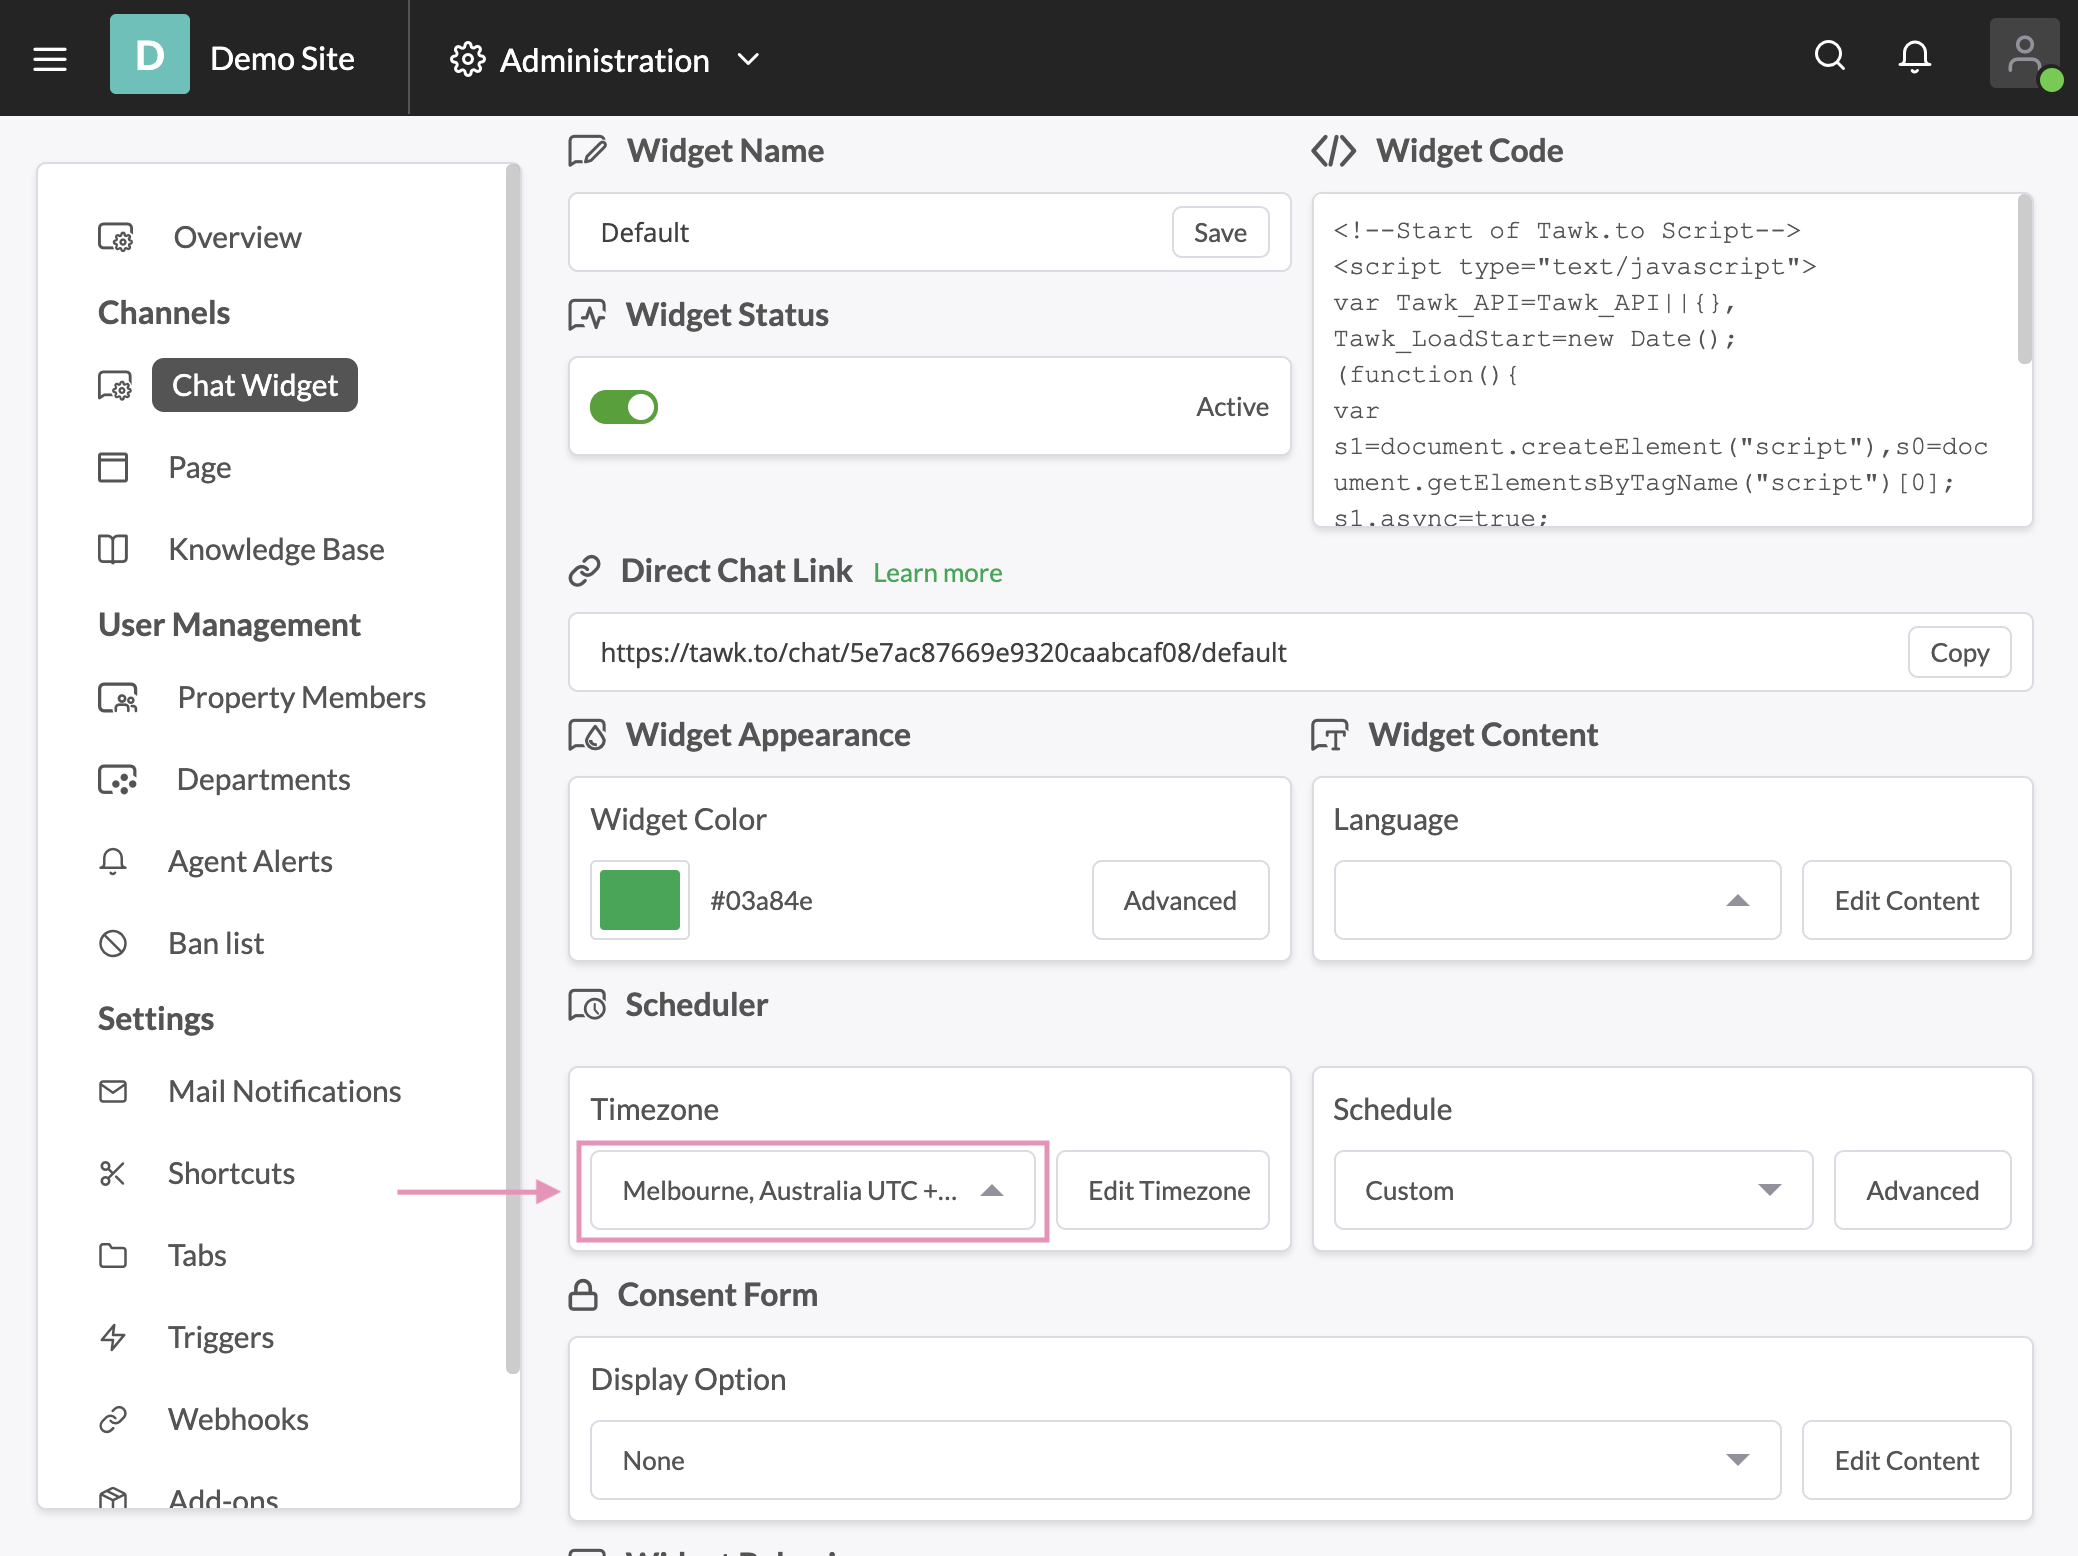
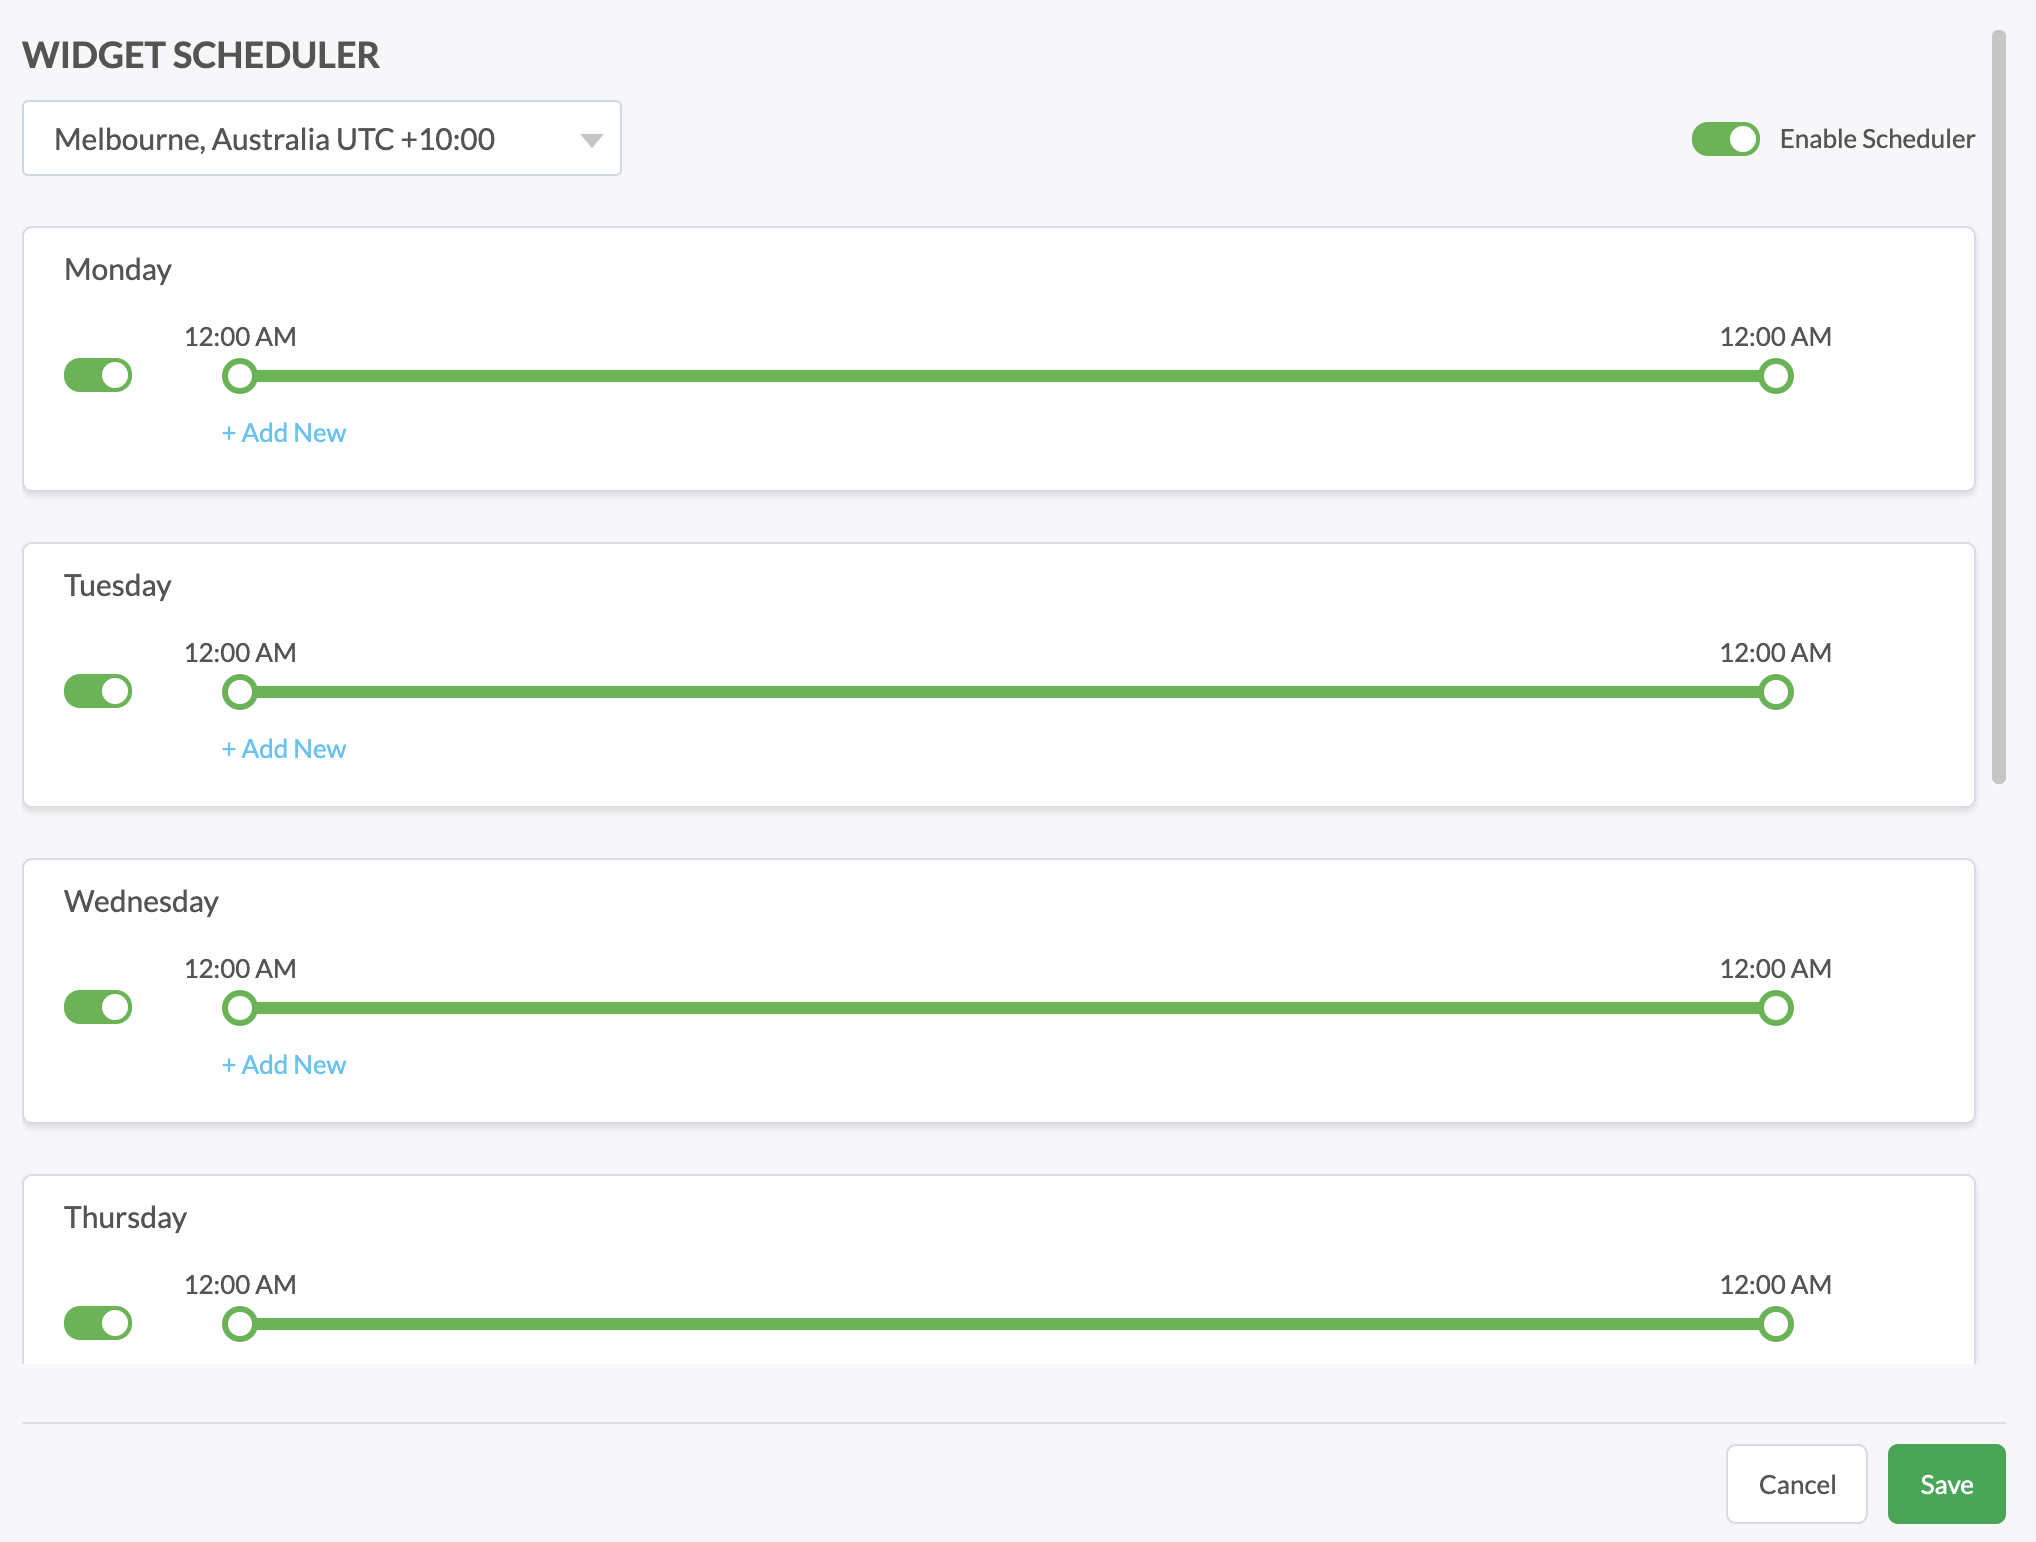
To create a Schedule for the Widget to be Online or Offline Follow These Steps:
- Go to Admin at the bottom of the left-hand sidebar.
![](https://www.tawk.to/wp-content/uploads/2020/03/Admin-cog2.png)
- Select the Chat Widget option on the left-hand side menu.
![](https://www.tawk.to/wp-content/uploads/2020/03/chat-widget-icon.png)
- Scroll down to Scheduler and select your timezone.
![](https://www.tawk.to/wp-content/uploads/2020/03/schedukler-timezone.png)
- Choose the city you are operating in.
- Then set the schedule as needed.
- Click Save.
![](https://www.tawk.to/wp-content/uploads/2020/03/scheduler-.png)
NOTE:
- When agents are online and the widget is scheduled to be online, consider page status to be online.
- When agents are online and the widget is scheduled to be offline, consider page status to be offline.
- When agents are offline and the widget is scheduled to be online, consider page status to be offline.
- When agents are offline and the widget is scheduled to be offline, consider page status to be offline.