Creating and managing departments
[Desktop]
Setting up departments helps direct the flow of traffic. Departments are especially helpful for big teams, allowing you to make sure only the right agents answer questions by allowing visitors to select a department in a Pre-Chat Form.
Departments are also useful when assigning tickets. When you assign a ticket to a particular department, everyone in that department will receive the email/notification.
With departments, your agents aren't wasting time trying to answer questions they don't know the answer to or giving the wrong answer because it's not in their area of expertise.
NOTE: The instructions below can only be completed from a browser or the tawk.to desktop apps. They cannot be completed in the tawk.to mobile app.
Here’s how to create a new department or make changes to an existing one:
If you have multiple properties, check to make sure you're viewing the correct one. Hover over the current property name in the upper-left menu to select a new property from the list.
Next head to ⚙️Administration ⮕ User Management⮕ Departments.

In the Departments section, you'll see a list of all of the current departments with a quick overview of the names, descriptions, members and whether they are in use.
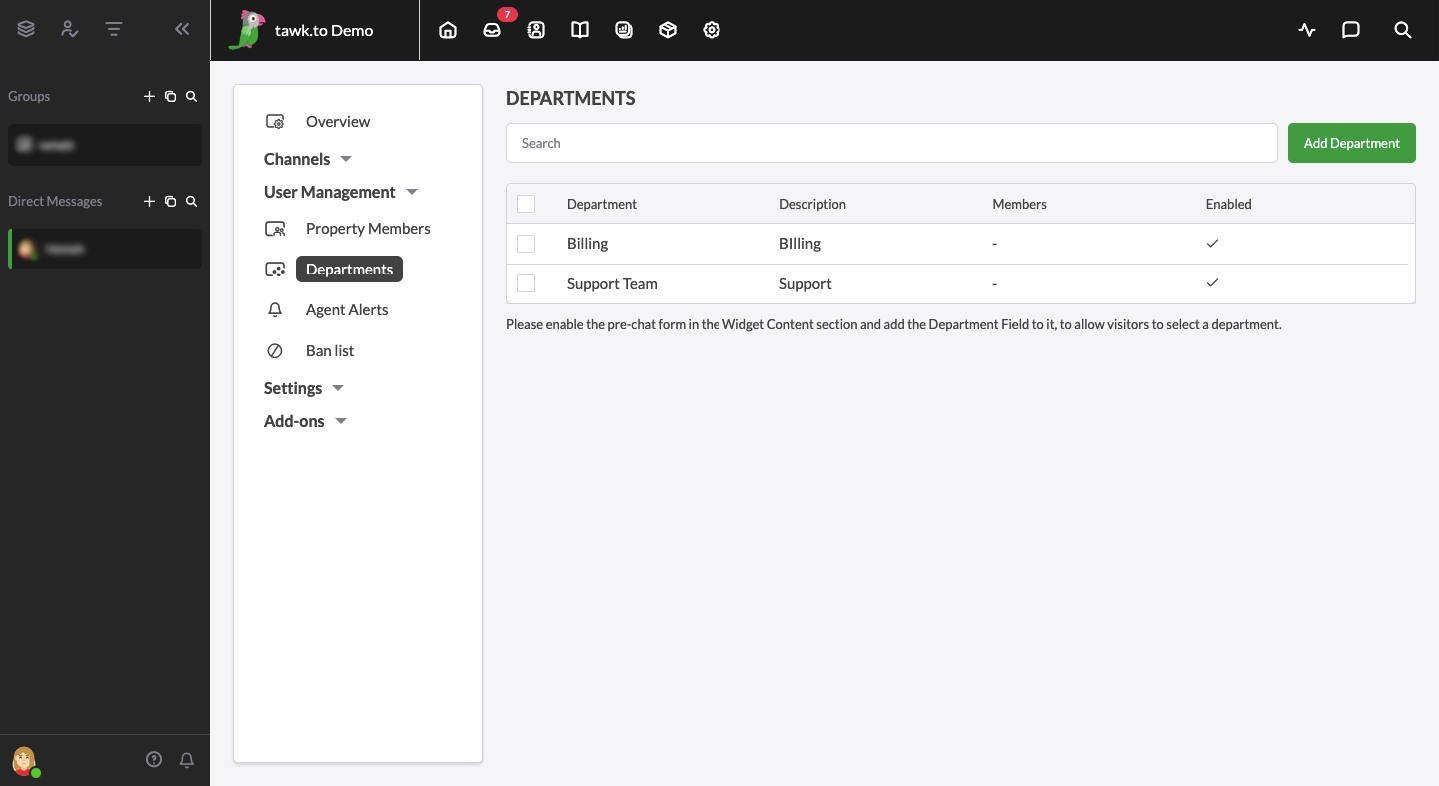
To make changes to an existing department, click on its name in the list to open the Edit Department window.
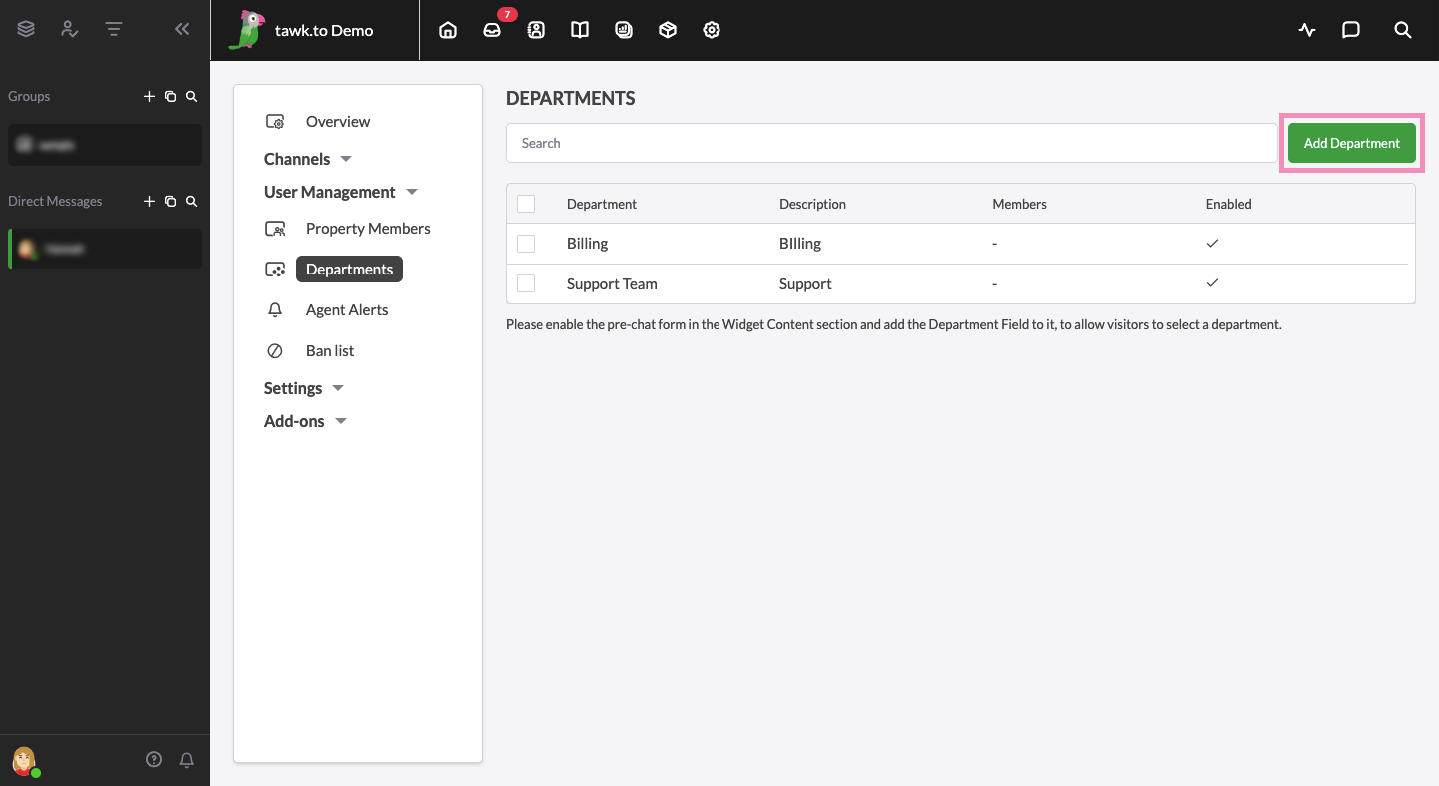
To make a new department, select the green Add Department button in the top right corner.
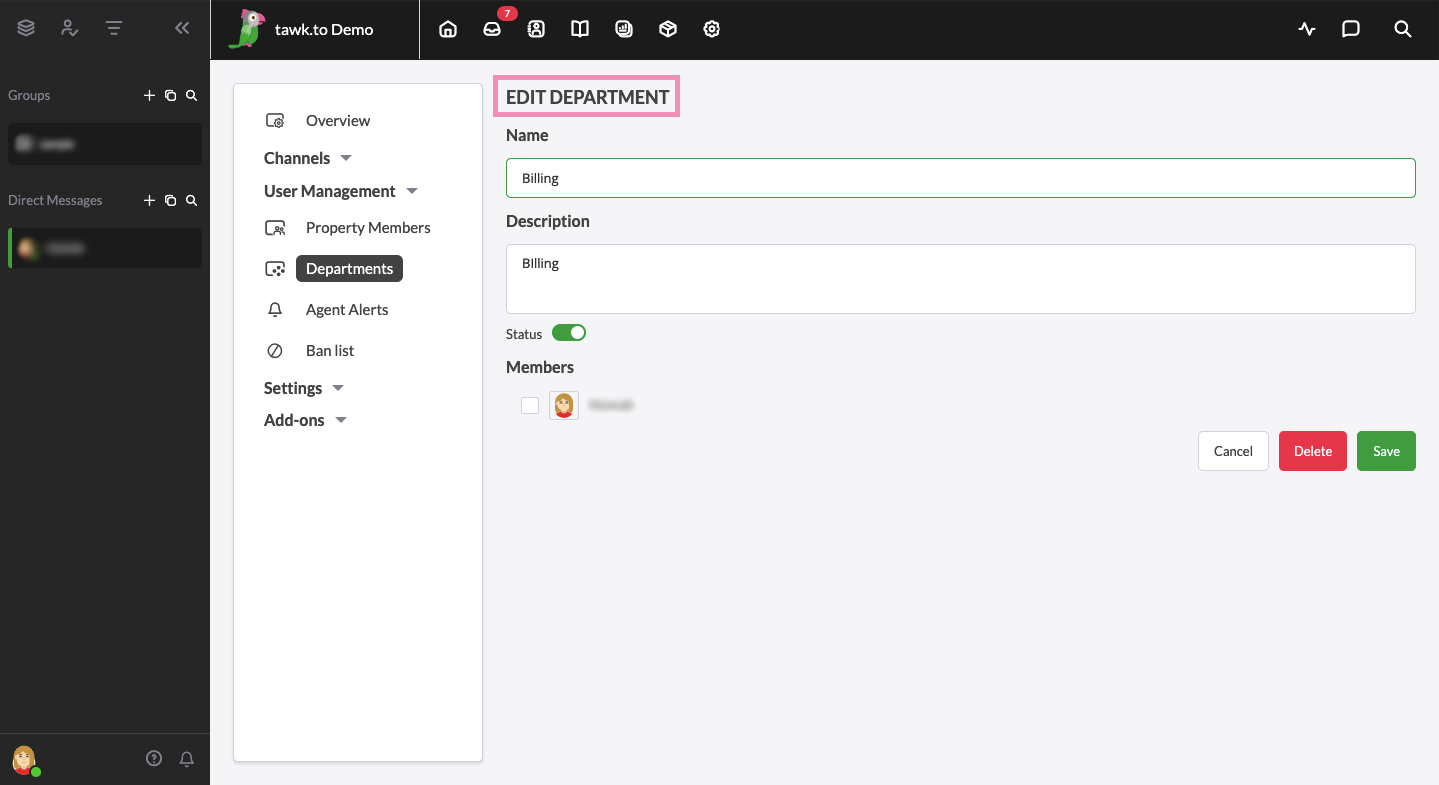
This will open a new window where you can give a Name and Description to the newly created department. Keep in mind that while the Description will only be seen by you and agents in your dashboard, the Name will be seen by visitors when they are prompted to select a department.
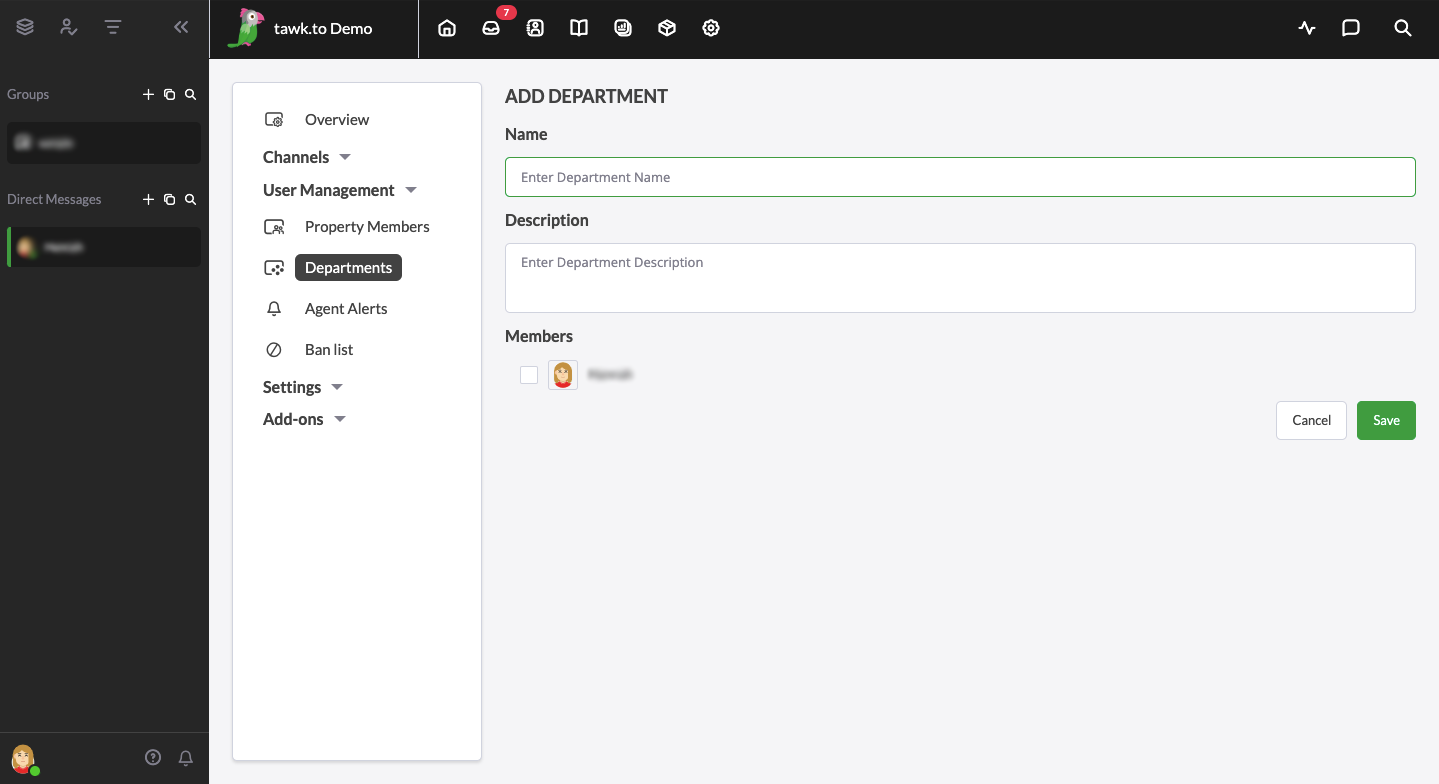
Once you've decided on a name and given an appropriate description, it's time for agents to the Department by checking the boxes next to their names and pictures. The list of agents will be made up of all agents that have been added to the current property.
When you're done selecting the agents you want to add, make sure to hit the green Save button in the bottom right corner of the screen. Make sure to add at least one agent to the department as departments without anyone in them can not be used and will remain invisible.
To give visitors an option to pick a department, you'll need to set up the Pre-Chat Form. Here’s how to set up the Pre-Chat Form:
Head to ⚙️Administration ⮕ Channels ⮕ Chat Widget.
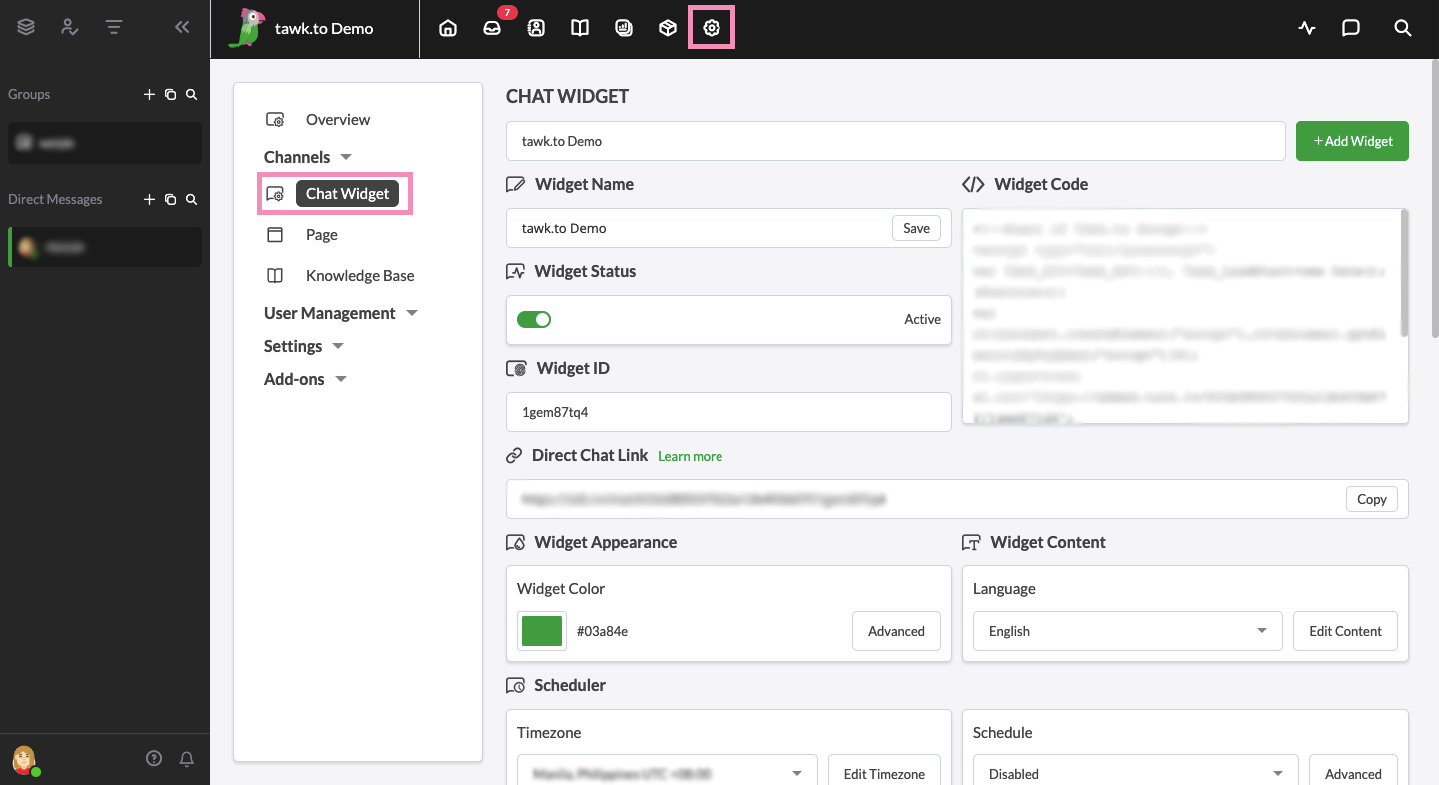
Then, under Widget Content, click Edit Content.

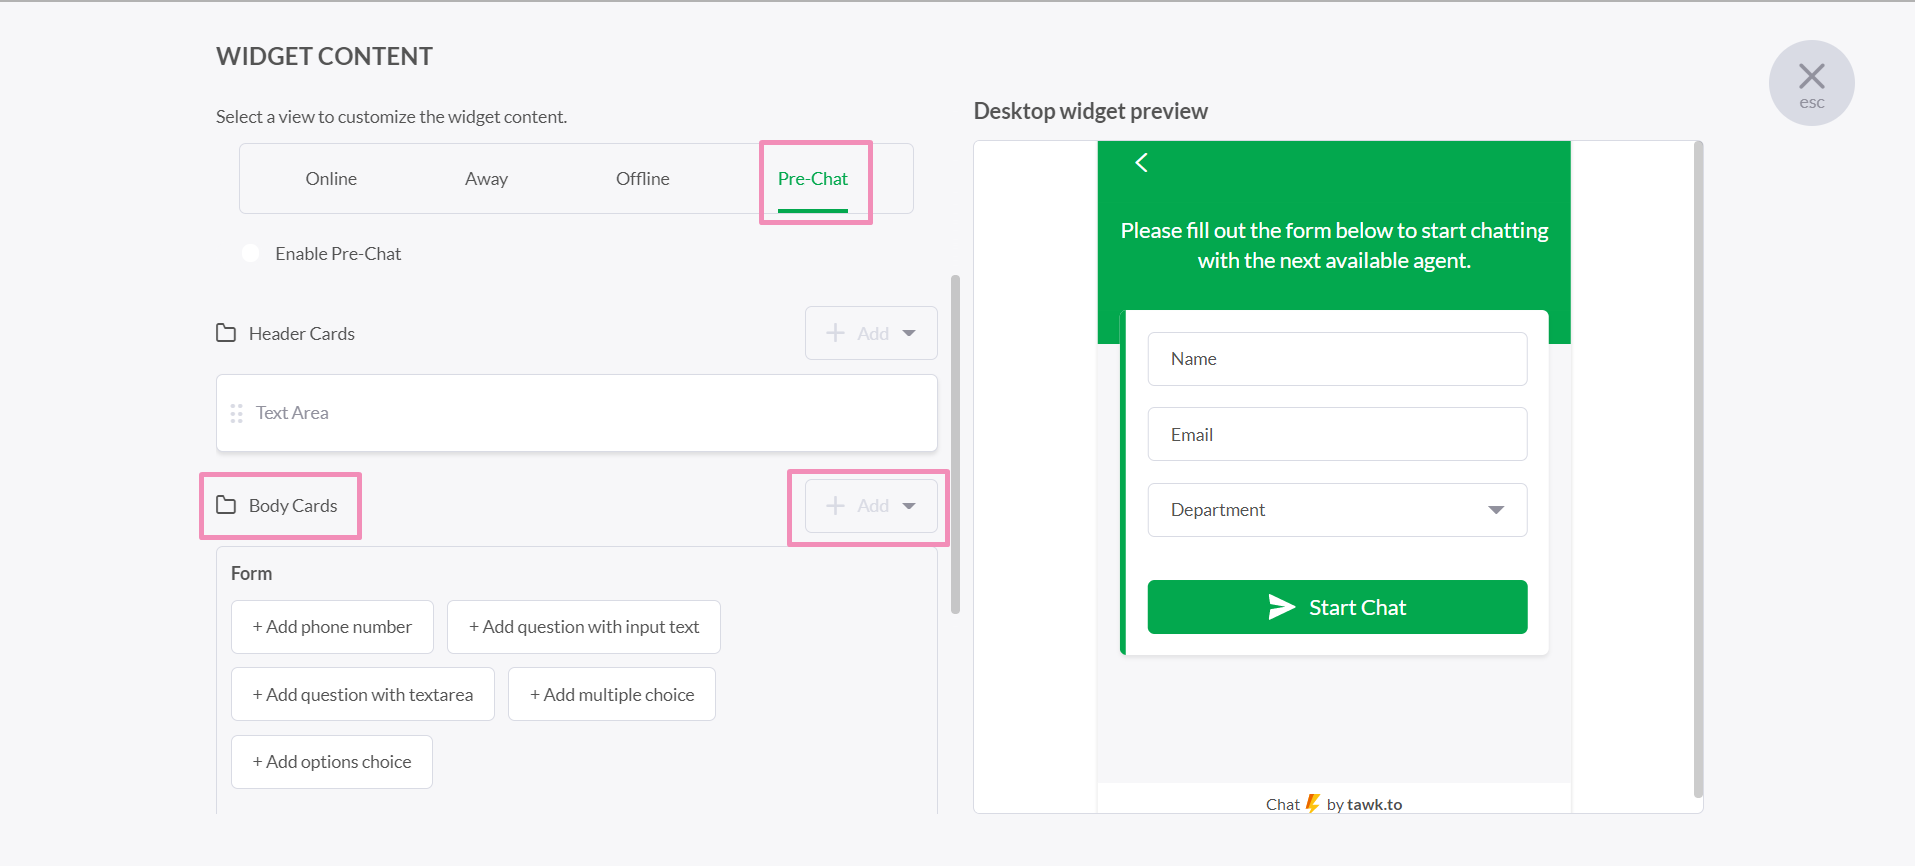
This will open a new window allowing you to make changes to the widget's greetings and change the overall content of the chat widget. Select Pre-Chat Form, make sure the green switch is on, then under Body Cards, click the +Add Button and select Form.
Under selecting Form, click +Add Department.
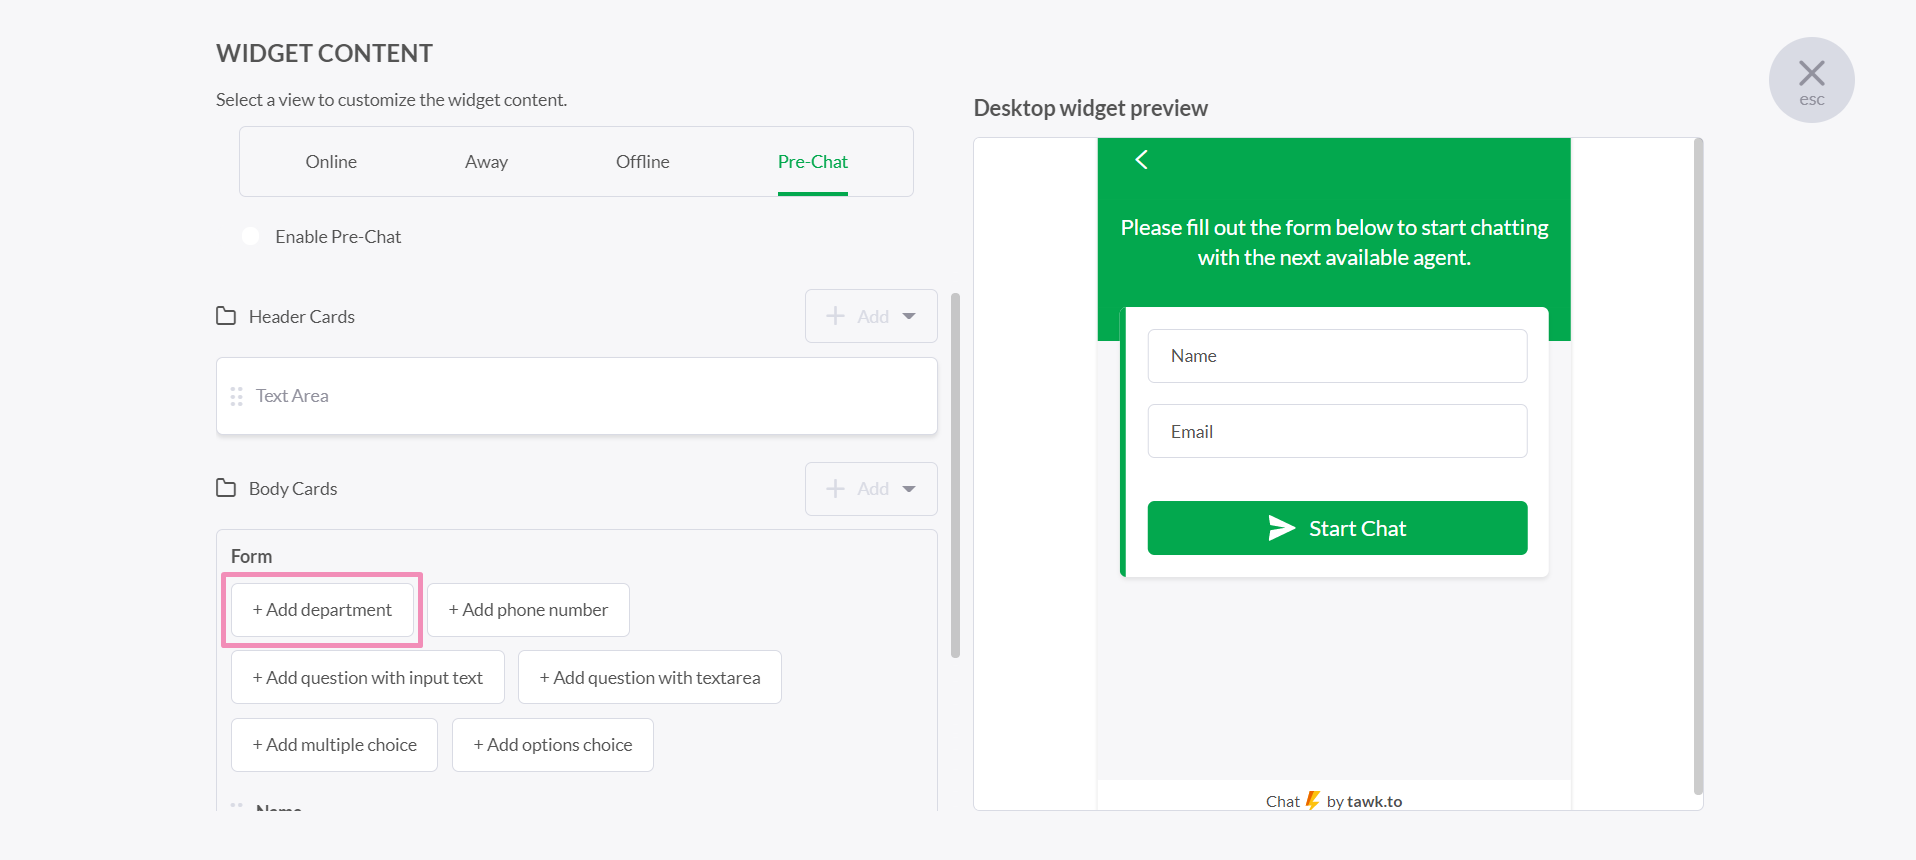
This will add a new option to the Pre-Chat Form, allowing visitors to choose from the enabled departments. You can make changes and get a look at how it will appear to visitors by checking the Content Editor on the right side of the window. If you want to make selecting a department mandatory, click the asterisk. It will appear grey when completing the form is optional and red when it's mandatory.
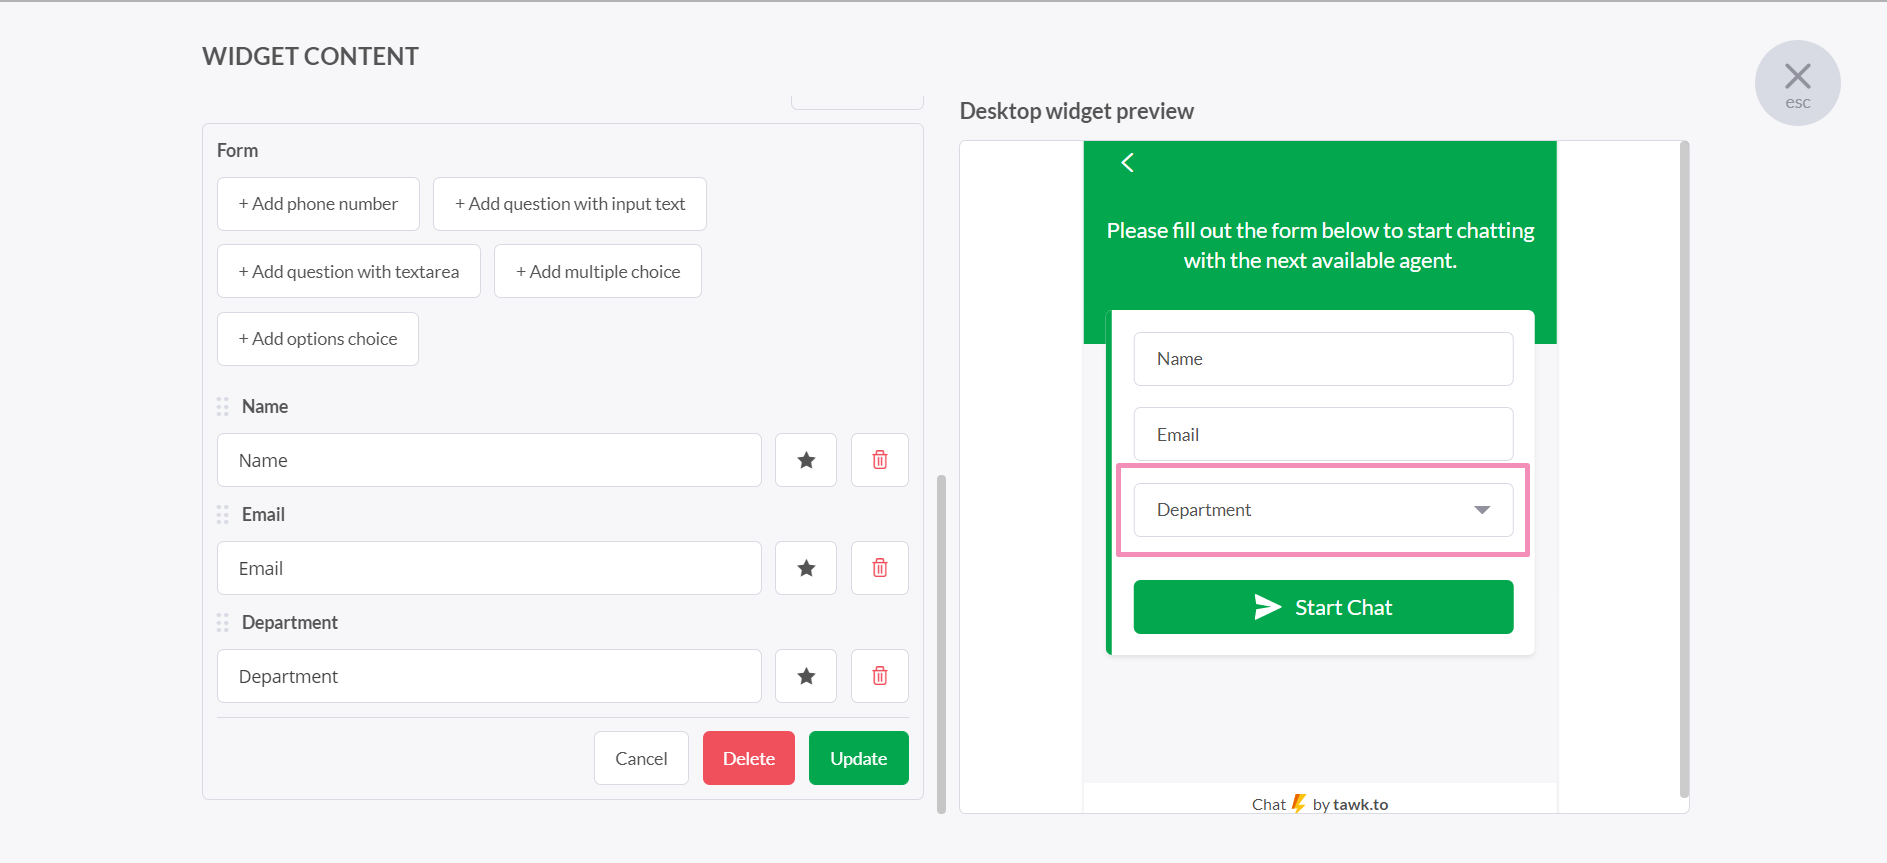
Make sure to save your changes by clicking the green Save button in the bottom right corner of the window.
With this all set up, visitors entering the chat on your site, will see the Pre-Chat Form and be prompted to choose from one of your Departments before a chat is initiated.
Need help creating and managing departments? Reach out to our support team or schedule a call.